
Dresser Makeover Without Paint: A Step-by-Step Guide
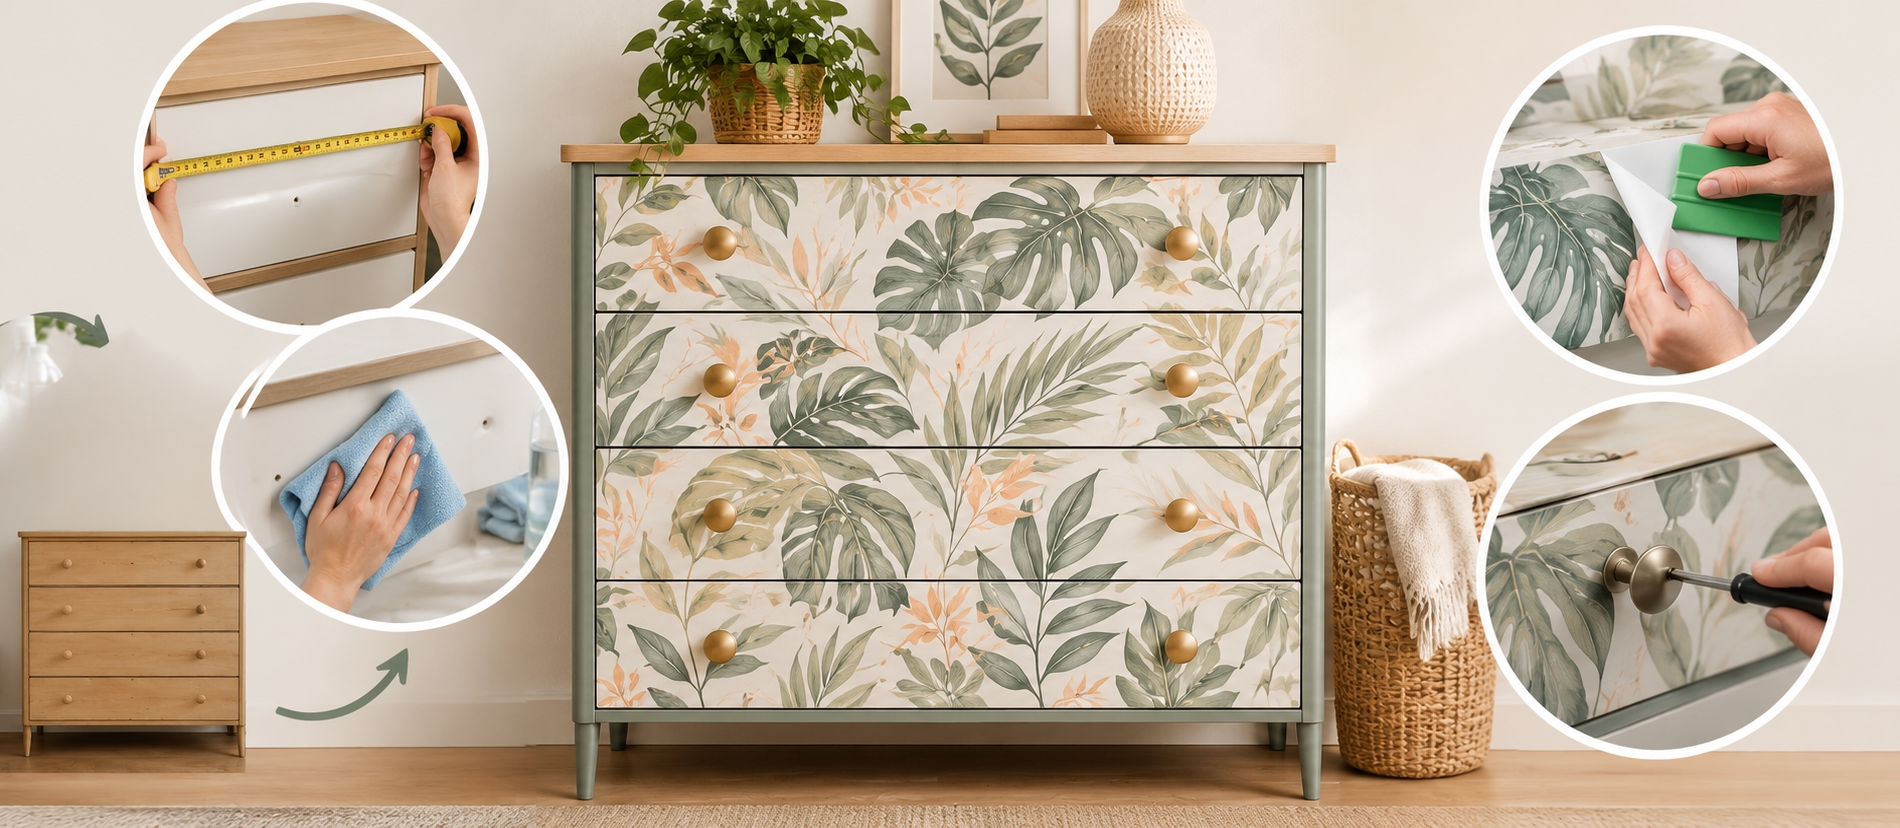
An old dresser is one of the easiest pieces of furniture to transform. It has large, flat drawer fronts, a simple shape and a big visual impact in a bedroom. Painting it, however, means sanding, priming, drying time and fumes. A vinyl makeover avoids all of that. With furniture decals and a free afternoon, you can give a tired dresser a completely new personality. Here is how to do it, step by step.
Step one: choose your style
Start by deciding the look you want. A continuous pattern across all the drawers, such as a geometric print, a floral design or a terrazzo effect, creates a bold statement piece. A wood or marble texture gives a more classic, upscale result. If you prefer a lighter touch, keep the frame as it is and decorate only the drawer fronts, or add a single floral motif in one corner. Look at the rest of the room for inspiration: a dresser that echoes the colors of the bedding or curtains always looks intentional.
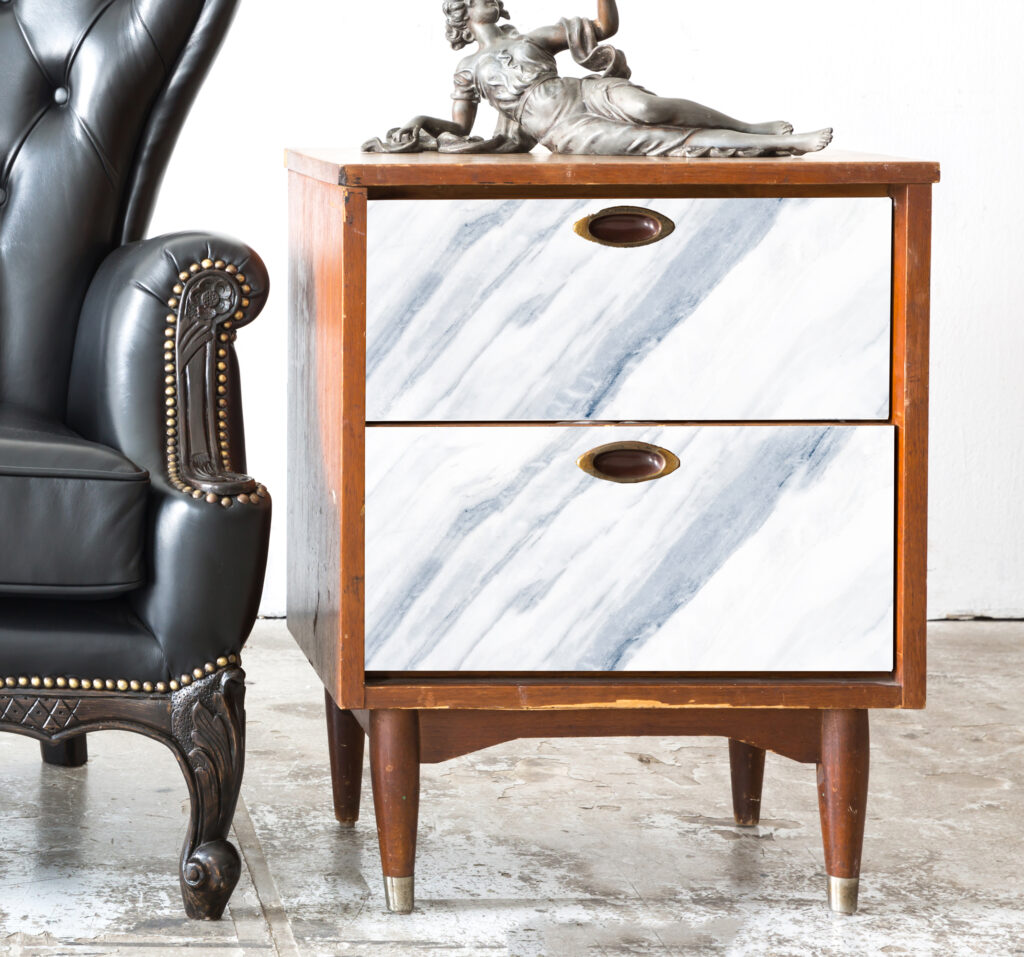
Pattern texture marble furniture decal
Step two: check the surface
Vinyl sticks best to smooth, sealed surfaces, such as painted wood, varnished wood and laminate. Run your hand over the dresser: if the finish is flaking, very rough or sticky, repair it first. Fill small chips with wood filler, sand them smooth and wipe away the dust. If you decide to paint any part of the dresser, such as the frame, let the paint cure for four to six weeks before applying vinyl on it.
Step three: measure every drawer
Remove the drawers and measure the front of each one, width and height. Drawers in the same dresser are not always identical, so measure them all and note which is which. For a continuous pattern across the whole front, measure the total height of the drawer fronts together as well, so the design lines up from top to bottom. Note the position of handles and knobs.
Step four: order the right sizes
Order each decal at the size of the drawer front, or slightly larger if you want to wrap the edges or trim them for a perfect finish. For a continuous design, ask for a single panel covering all drawer fronts and cut it into strips that match each drawer. Number the pieces on the back so you apply them in the right order.
Step five: prepare the drawers
Remove all handles and knobs and keep the screws in a small bowl. Clean the drawer fronts with water and a mild degreaser, especially around the handles, where hands leave oil. Rinse, dry thoroughly and let the surface rest until it is completely dry.
Step six: apply the decals
Work on one drawer at a time, laid flat on a table. Peel back a few inches of the backing, align the top edge of the decal with the drawer and press it down. Then pull the backing away gradually while smoothing the vinyl with a squeegee, always from the center towards the edges. If a bubble appears, lift the vinyl gently and smooth it again. Finally, trim the excess along the edges with a sharp craft knife, keeping the blade at a low angle.
Step seven: handles and finishing touches
Feel for the handle holes through the vinyl, make a small cross-cut over each one and screw the handles back on. This is also the moment to consider new hardware: brass knobs, leather pulls or black handles can completely change the style of the dresser. Slide the drawers back in and check that the pattern lines up.
Caring for your new dresser
Wipe the decals with a soft, damp cloth and mild soap when needed. Avoid abrasive sponges and strong cleaners. If a corner starts to lift after daily use, clean under it, warm it slightly with a hair dryer and press it down firmly.

Kitchen wall sticker chef’s kitchen
Ideas to try
For a kids’ room, decorate each drawer with a different color or animal. On the other hand, for a boho bedroom, choose a tropical leaf or rattan-effect pattern. For a modern look, try a black-and-white geometric design with matte black handles. For a vintage feel, combine a soft floral print with porcelain knobs.
A new dresser in an afternoon
A dresser makeover without paint is fast, clean and reversible. Choose a style, measure carefully, prepare the surface and take your time with the application. With the right decals and a few new handles, an ordinary dresser can become the centerpiece of the room.